Duct Testing Best Practices
October 29, 2018
Authored By: Sam Myers
Testing ductwork in residential HVAC systems for air tightness is essential to ensure a home will be energy efficient and comfortable. Tighter ducts help homes perform better by allowing conditioned air to travel to its intended destination. They also keep newly conditioned air from escaping to the outside of the home. More states and municipal code jurisdictions are including duct sealing and testing requirements in their energy codes for residential new construction. It is also a part of the RESNET HERS Rating process as well as a function of BPI Analysts when they perform energy audits. There are two methods used for testing ducts: Total duct leakage and leakage to outside (LTO). It is best to verify with local code requirements to see which method is specified. Some state and local codes specify a target for both methods. Both methods require the use of a calibrated duct testing fan combined with a pressure and flow gauge such as the Retrotec DucTester and the DM-32 gauge.
Total Duct Leakage
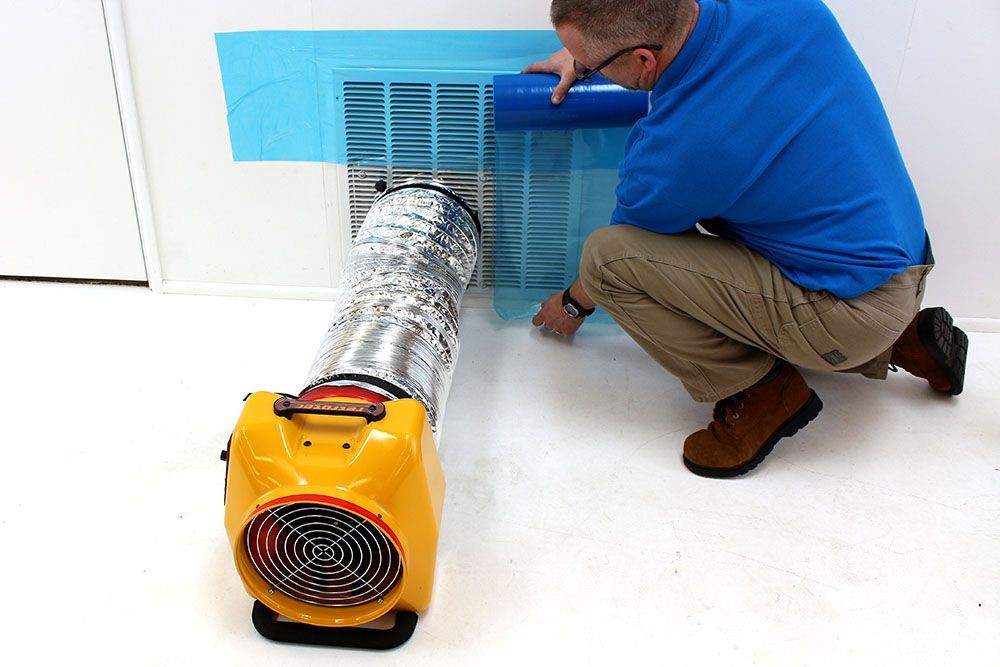
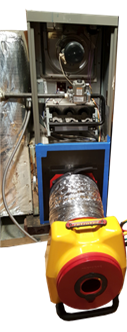
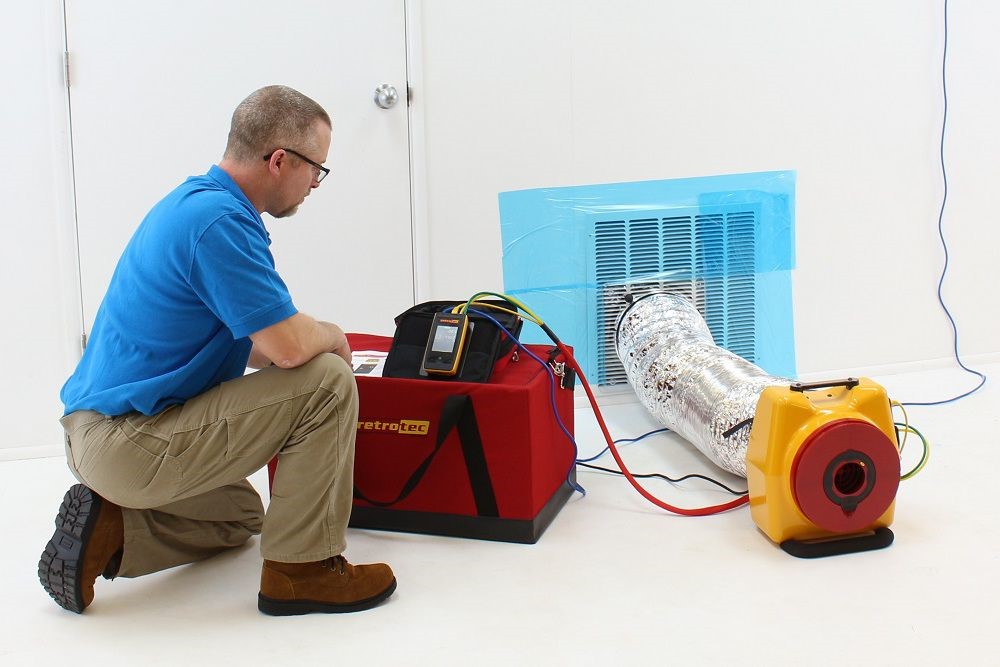
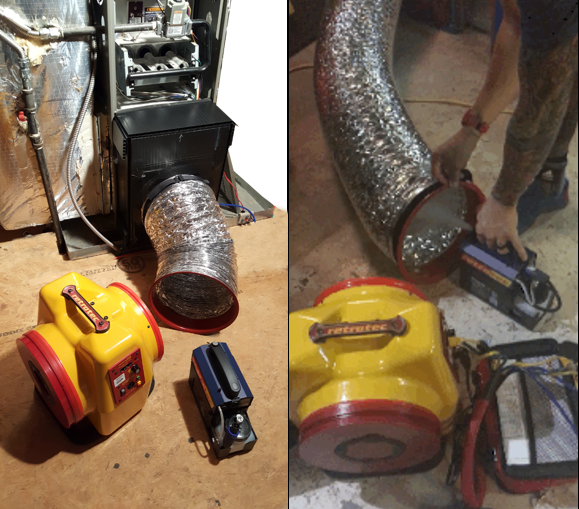
Total duct leakage tests measure all leakage in the duct system which includes leakage to both inside and outside of the conditioned space. It most cases, the flex duct from the duct testing fan is taped to the main return with the filter removed. Retrotec’s DucTester comes with a clear flange that clips directly to most return grills. This prevents the assembly from falling and makes it easier to tape the flange to the return. If needed, the flange can also be installed at the air handler by removing the service panel door and using duct mask or a homemade rigid panel to secure it. In the photo below, there is a DucTester attached to the air handler with a piece of corrugated plastic used to set the flange in place. This practice is handy if you are frequently testing the same units.
It is good practice to extend the flex out and keep it in as straight of a line as possible. It is important to make sure all supply, return and outside air ventilation diffusers and inlets are taped over. If the house is built on a conditioned crawlspace, make sure supplies are not missed there as well. Also make sure a window or door is open so that the indoor pressure is matched with that of the outside.
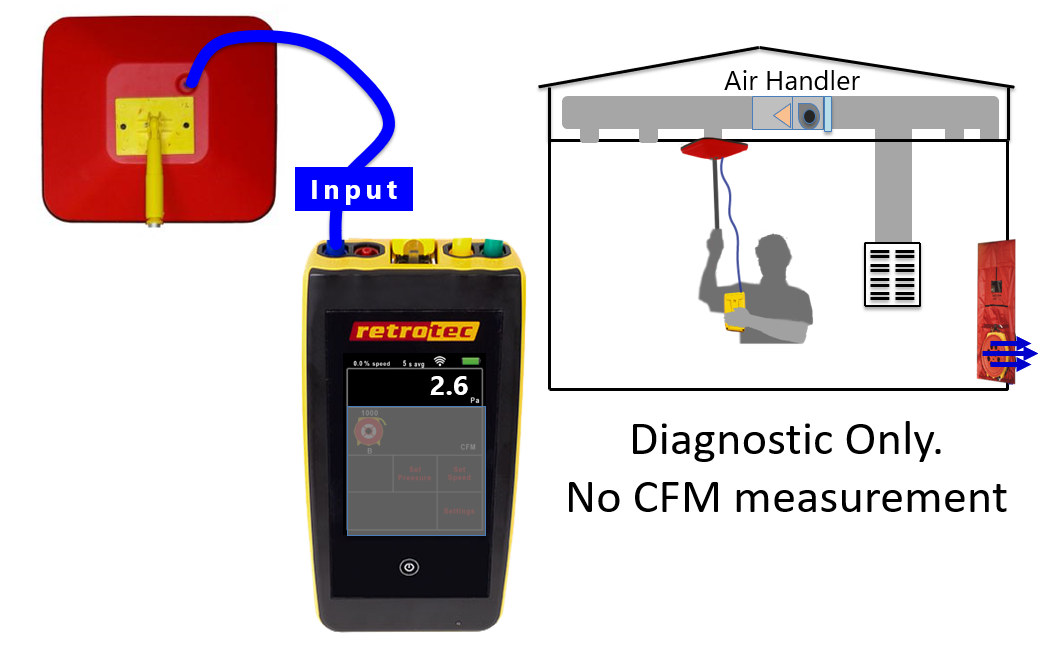
Once everything is sealed, install the reference tube (blue if using Retrotec) in the supply register that is closest to the air handler. The other end of this tube attaches to the B channel of your gauge (blue hose to blue port). This measures the pressure in the duct system with respect to the main space when the test is in progress. Do not use the end of the hose to poke a hole in the tape at the register as this can clog the end. Use your finger or a knife to make a small hole and insert the tube. Add more tape around the hole to keep the tube from falling out. Make sure tubes connecting the fan and gauge are appropriately connected. If using Retrotec, match the yellow tube the yellow ports and green tube to the green ports. For TEC equipment, refer to your manual. For most standards, you can pressurize or depressurize the ducts. Retrotec recommends depressurizing so that tape is pulled toward the diffuser to make a tighter seal. Pressurizing ducts can sometimes loosen or blow tape off of diffusers.
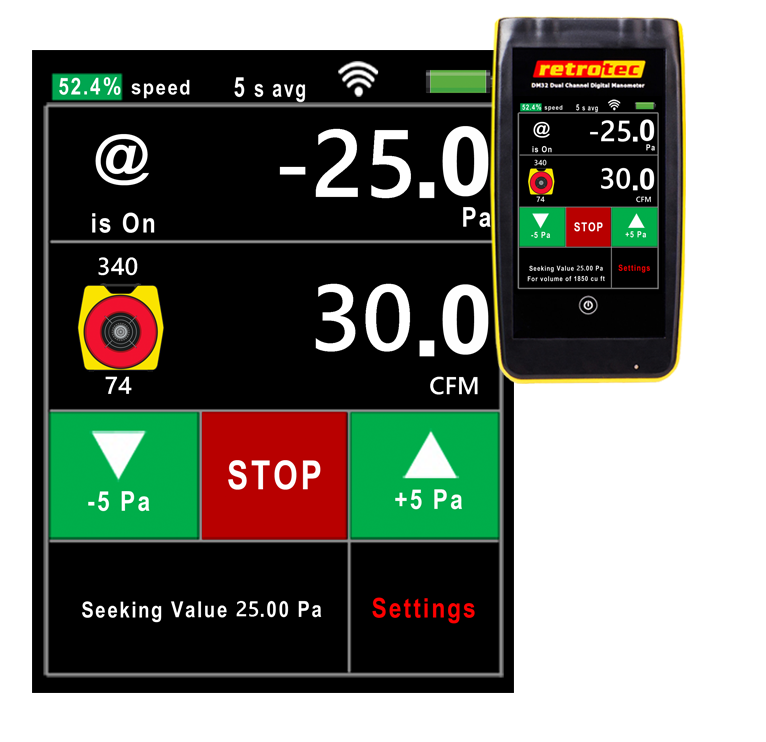
At this point, all that is left is setting up the gauge. Make sure it is set up to read flow in CFM and the duct testing fan you are using is selected with the proper ring or range setting. Make sure the fan is powered on. If you are using a DM-32, tap on “Set Pressure” and enter “25” and “Set”. This will run the test to + or -25Pa automatically.
If you’re using a DM-32 gauge and cannot reach + or -25Pa, change the range on the fan to a larger hole size. Also make the change in the gauge accordingly. If two dashes are appearing, that means there is not enough fan pressure which means you need to change your range to reduce the hole size at the fan inlet.
Leakage to Outside
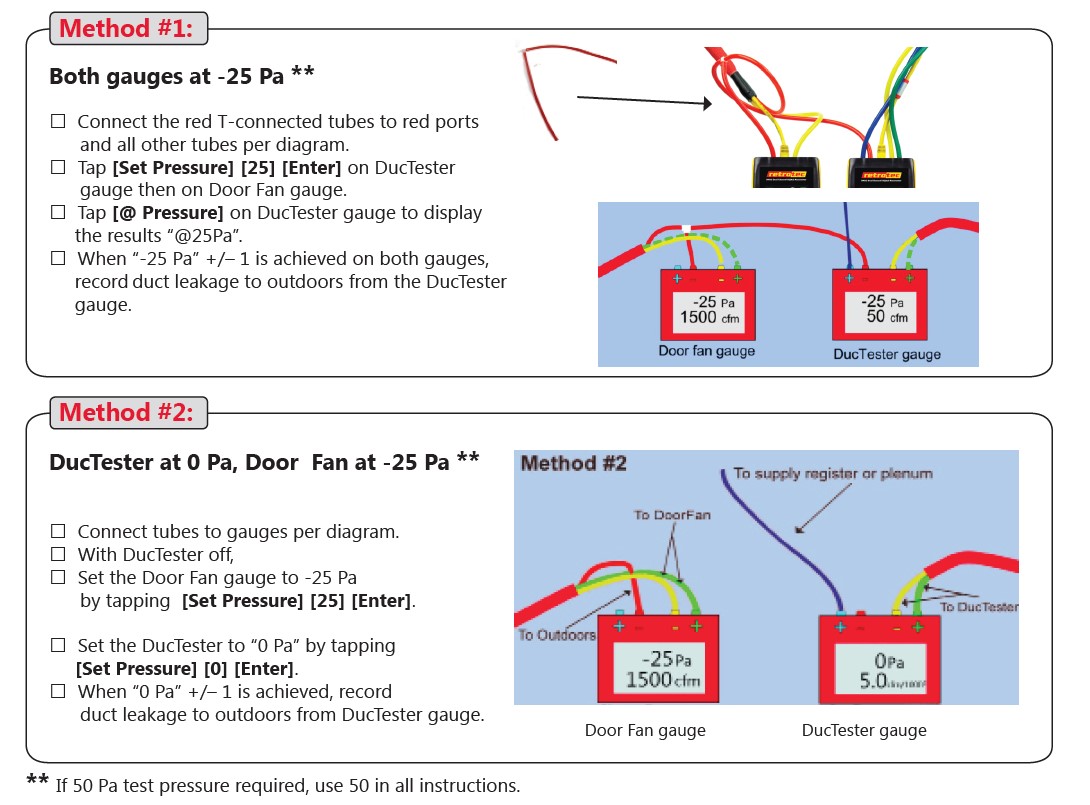
In some standards and codes, a duct leakage to outside (LTO) test is required or allowed. This is where a blower door is needed to match the pressure of the interior space with the pressure of the duct system as the duct tester fan is running. This way, the gauge connected to the duct tester will only provide a reading for air leaking outside of the conditioned space. Setting up the test will be similar to a total duct leakage test with all supplies and returns taped up. As shown below, there are two ways to run a LTO test. Many testers prefer Method #2 since it doesn’t require running a tube to connect the blower door and duct tester gauges together.
One common misconception about LTO is that homes with all ductwork in the conditioned space cannot have duct leakage to the outside. This is not true as air that leaks from ductwork into the conditioned space can still find its way outside through leaks in the envelope.
Testing at Rough-in
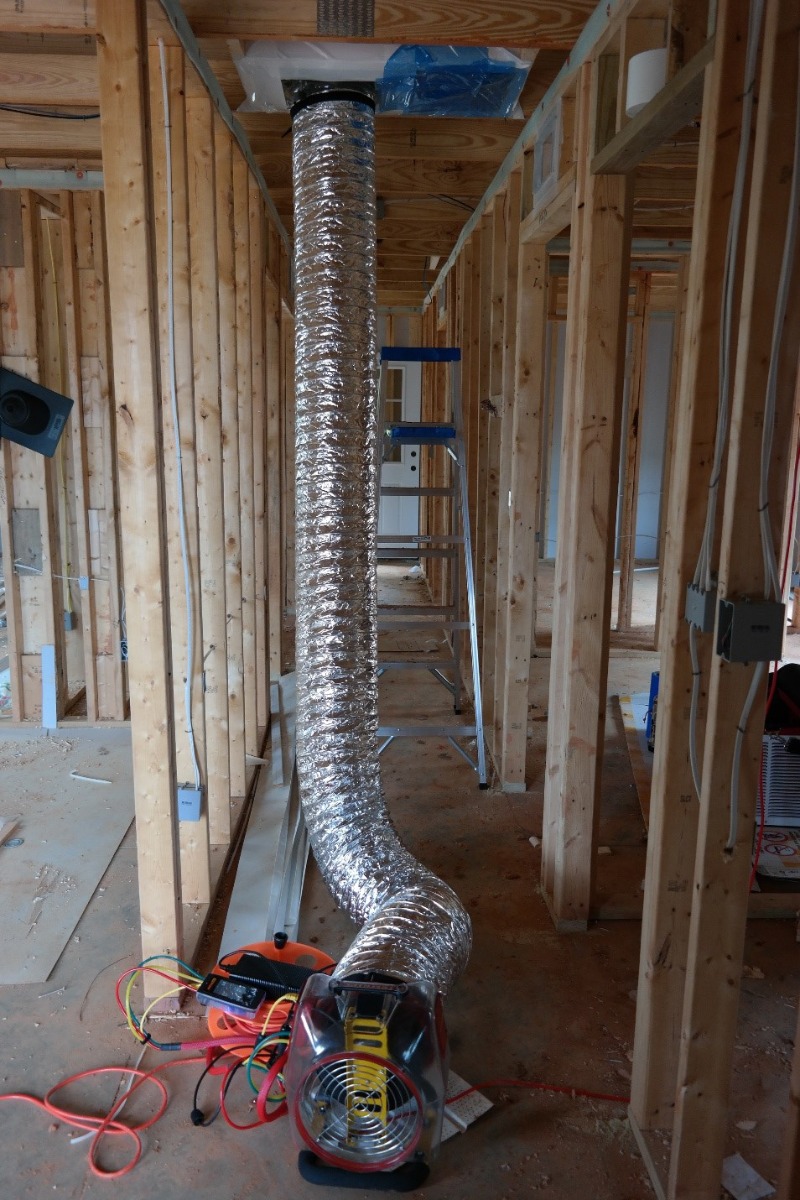
In some standards, testing at the rough-in stage of construction is accepted or required. This is for new construction homes or homes that are getting a gut rehab. Since drywall is not yet installed, testing at this stage makes it easier to locate and access leaks that need to be sealed in the duct system. This is a best practice for installers to ensure that all leaks are sealed before floor cavities and duct chases are encapsulated with drywall. It also ensures that the installer doesn’t need to return later in the construction process to seal leaks, so long as no other trades puncture or pull duct connections apart by accident. Refer to the Quick Tips for Testing at Rough-In article for more information on testing at the rough-in stage of construction.
Testing at Final
Testing for duct leakage at the final stage of construction is the most commonly required duct test performed for new construction and existing homes. Before you begin setting up the test, make sure the HVAC system is set to “Off”. Also check to see if any mechanical ventilation is tied into the system. If it is, a switch on a timer could force a ventilation or air handler fan on. Make sure any installed ventilation controls are set to “Off” or at least temporarily disabled so that the test can be performed. When setting up your duct testing equipment, follow the same process in the Total Duct Leakage section of this article.
Hunting Down Leaks
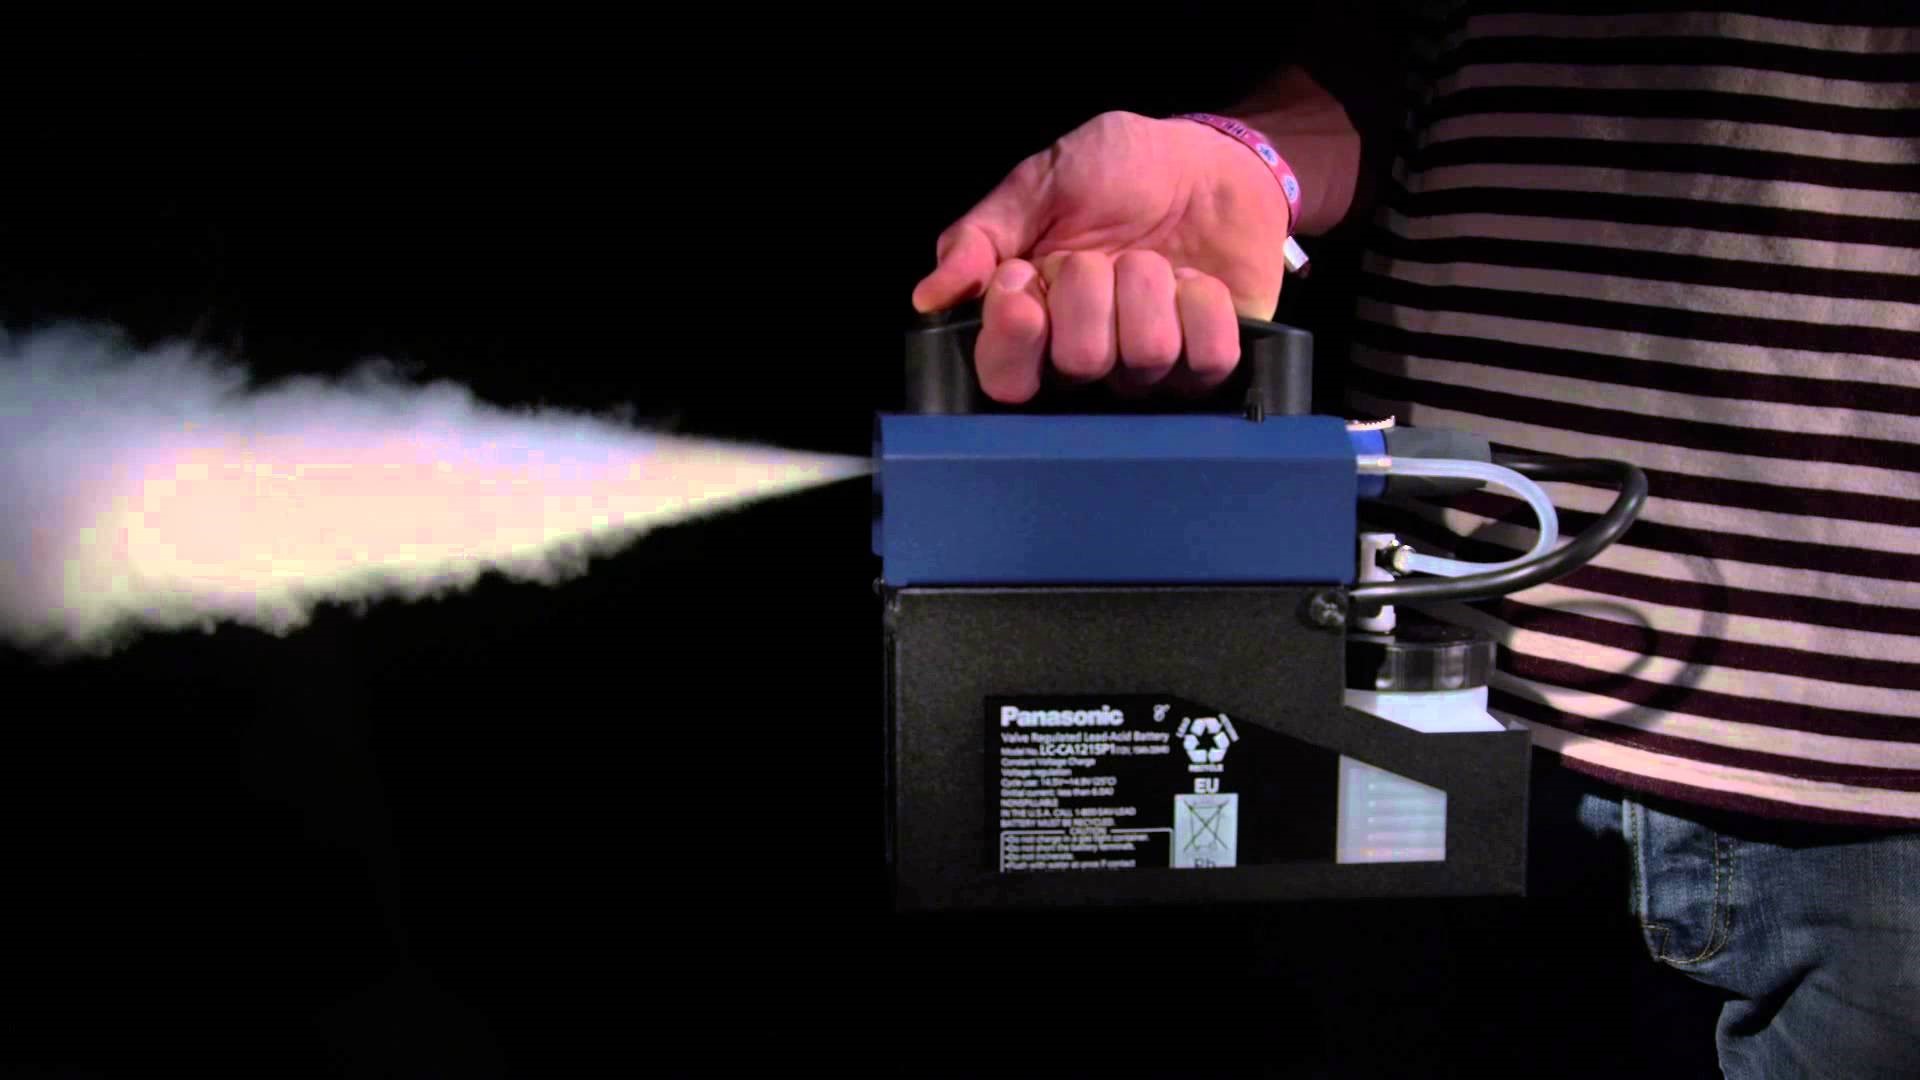
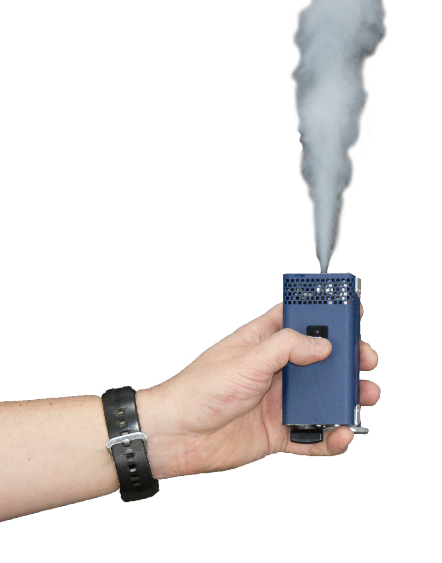
If the ducts are too leaky and do not meet the target for code or a desired third-party standard, leaks will need to be located and sealed. One way to locate leaks is by using a smoke emitter. Until now, this involved using actual smoke caused by lighting a device to produce real smoke or by using handheld smoke puffers that rely on harmful chemicals such as titanium tetrachloride. There have also been oil-based emitters, but they have proven to be unreliable in the field and sometimes even break or leak during shipping. The newest form of smoke emitters available have proven to be the best so far. They use a vaporizer and produce a glycol-based vapor that behaves like the previously mentioned smoke devices. The vapor is odorless, noncorrosive and is not harmful to inhale. There is a handheld vaporizer called the Tiny S made by Look Solutions for spot checking as well as a larger version called the Power Tiny which can smoke a whole duct system.
If you are using a smoke emitter to fill a duct system, never use your duct testing fan to pull the smoke through the duct. As shown below, detach the fan from the flex and inject the smoke directly into the flex. Then reattach the fan to push the smoke through the system.
Another effective option for findings leaks in ducts is to use a pressure pan with a blower door. Set your blower door to depressurize the house to -50 Pa and detach your gauge or use a second gauge that will not be connected to the blower door. Attach a hose to the blue port on your gauge with the other end attached to the pressure pan. As shown in the diagram below, place the pressure pan over supplies and returns with the blower door still running. You’ll leave the diffusers in their natural state with nothing taped off. There is no particular number that you’re looking for here. If you are testing supply registers and notice that some of the readings are significantly higher than others, the branches connected to those registers are where you want to focus your attention when sealing the ducts. Retrotec makes a small and large pressure pan to accommodate both supplies and returns.
Apps to Use with Your Duct Testing Equipment
Gauge Remote
Control your duct testing fan remotely with your smartphone or tablet using the GaugeRemote app with the DM-32 gauge. This app mirrors the screen from your gauge onto your Apple or Android phone or tablet, giving you remote control of all its settings. Since the DM-32 gauge operates both Retrotec and TEC fans, you can use it with both brands. Controlling your fan from anywhere in the home allows you to hunt down leaks in ducts faster so that you’re not having to continuously run back to the fan to adjust its speed. This way, you can have your phone controlling the fan in one hand and a handheld smoke emitter in the other. This is extremely helpful if your duct system is in an attic or crawl space and your duct testing equipment is set up inside the main space. Using GaugeRemote can reduce the time it takes to find leaks as well as reduce the number of people needed to operate equipment.
rCloud
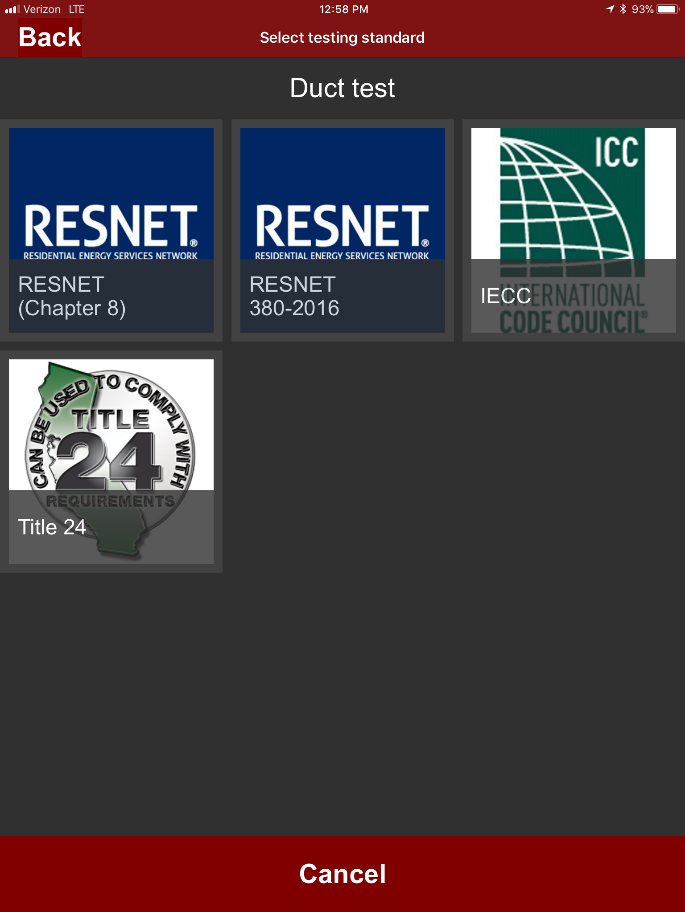
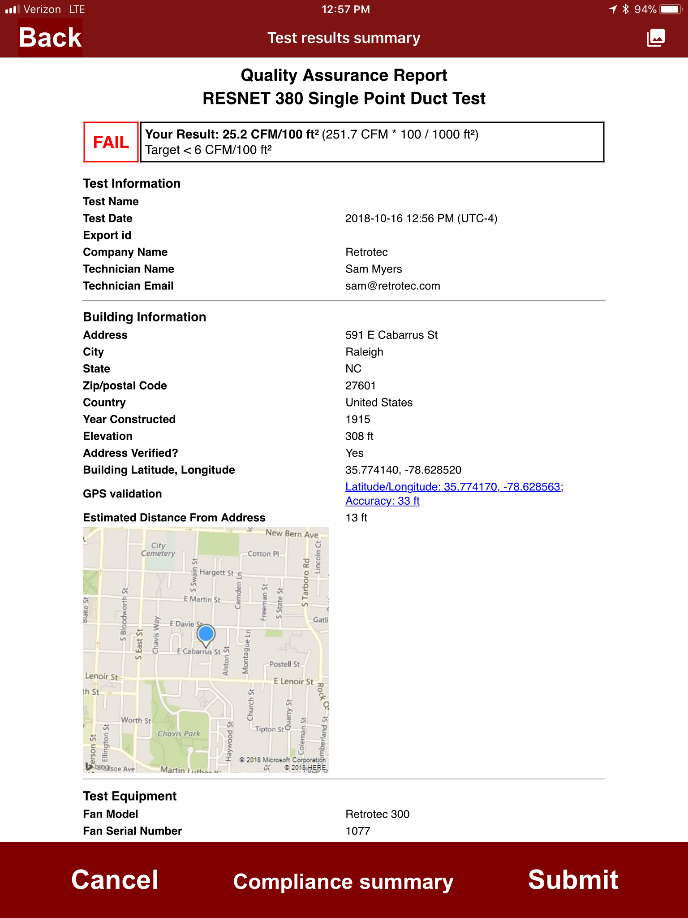
Automatically run a duct leakage test and generate a report with rCloud. You can choose from a variety of standards including RESNET 380. This app will geolocate your position and verify the address using Zillow. You can also choose “new construction” if the address is not yet in Zillow’s database. rCloud will also pull local weather data to provide the outdoor temperature. You can set your own leakage target and the report will tell you if the home passed or failed the test in the upper left-hand corner in green or red lettering. This report is the ideal document to submit to a HERS provider, building official, building owner, etc. to prove that a test was conducted at a certain location at an exact time to a specific standard.
Thanks to technological advances in diagnostic equipment and software, there are several options available these days when it comes to running a duct leakage test and locating leaks. This allows you to develop your own custom process that works best for you. Always check to make sure your testing process complies with the standards of the code or home performance program you are working with. Keep an eye out for future Retrotec webinars that cover multiple ways to use your diagnostic tools. If you are not on our mailing list, please reach out and let us know. You can also find previous webinars on our YouTube channel. You are always welcome to reach out to Retrotec with any questions you have.
Recent Posts