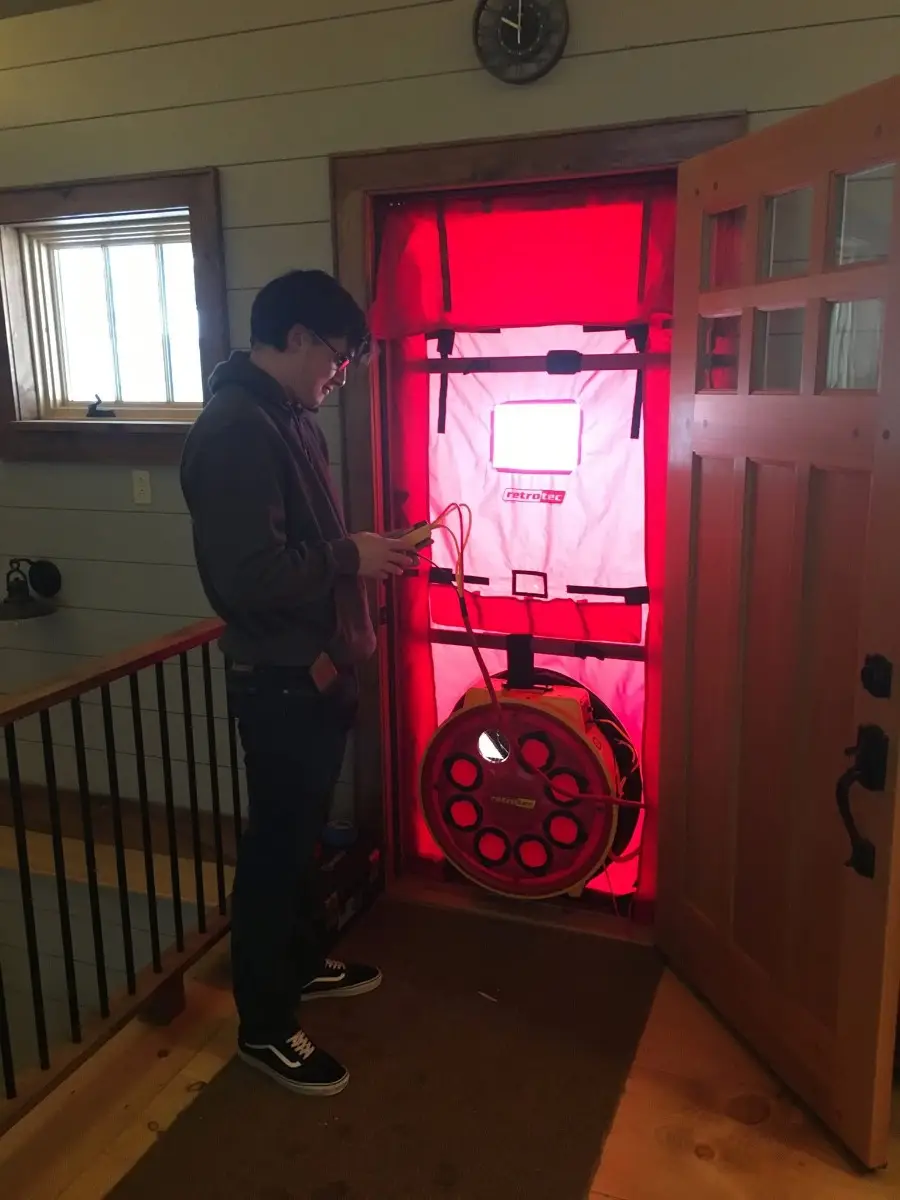
By Noah Lawrence, Technical Trainer & Customer Success Lead, Retrotec
Blower Door Testing — Lessons from the field, so you don’t learn the hard way.
Technical Guide/Blower Door Testing/Field Lessons
Rev. 01 · 2026.04
Blower door testing, the hard way.
Real-world lessons from a first-time tester’s trial by fire — distilled into the checklist, troubleshooting steps, and field wisdom you need to get it right on day one. Based on the experiences of Noah Lawrence, Retrotec Technical Trainer.
§ 01 Primer
What goes wrong and why it matters
A blower door test looks simple on paper — mount the fan, hit 50 Pa, read CFM. In practice, most failures come from preparation gaps, not equipment problems.
The Test
What is a blower door test?
A calibrated fan mounted in an exterior doorway depressurizes (or pressurizes) a building to a standard reference pressure — typically 50 Pa — and measures the resulting airflow. The airflow equals the total air leakage through the building envelope.
Target
50 Pa (0.2 in WC) building-to-outdoor pressure difference
Result
CFM50 or ACH50 (air changes per hour at 50 Pa)
Pass/Fail
Varies by code — e.g., NY requires ≤ 3.0 ACH50
Duration
15–30 min (test only); 1–4 hrs with diagnostics
The Reality
Why do first tests go wrong?
The equipment is forgiving. The field conditions are not. Most rookie failures stem from incomplete preparation, unfamiliarity with gauge readings, and skipping the pre-test walkthrough.
Prep Errors
No building plans, no volume calc, missing tools
Setup Errors
Frame assembly, shroud orientation, cam levers
Reading Errors
Wrong range, swapped tubing, “–” on display
Condition Errors
Open dampers, dry traps, unblocked vents
§ 02 Preparation
Before you leave the office
Half the job happens before you arrive on site. Request building plans in advance, pre-calculate volume from your desk, and pack every tool you might need — not just the blower door.
Pre-Test Site Preparation Checklist
Planning & Paperwork
Request building plans or floor plans from the builder/owner
Pre-calculate building volume from plans (L × W × H per floor)
Confirm code requirements for the jurisdiction (ACH50 target)
Set a clear, professional price before committing to the job
Set up rCloud reporting template (avoid handwritten reports)
Equipment Load-Out
Blower door fan + frame + nylon panel (pre-assembled check)
DM32X gauge with fresh batteries and tubing set
Smoke generator (AirTracer) for leak visualization
IR camera for thermal anomaly detection
Tape (painter’s + foil), foam board, can foam for sealing
Ladder (for ceiling access and high leak points)
PPE — dust mask, safety glasses, gloves
Pressure pans and flow boxes (if testing HVAC register leakage)
On-Site Pre-Test Walkthrough
Close all windows, exterior doors, and fireplace dampers
Turn off all combustion appliances (furnace, water heater, fireplace)
Fill all plumbing traps with water (especially unused fixtures)
Verify ERV/HRV dampers are closed or ports are sealed
Check dryer vent damper closure
Identify the testing boundary — what’s conditioned vs. unconditioned?
Pricing Tip
Set a reasonable, well-defined price from the start. It’s much easier to offer a discount later than to raise your price after the fact. Factor in diagnostic time — a simple pass/fail takes 30 minutes, but a leak hunt with remediation guidance can take half a day.
§ 03 Equipment
Your testing toolkit
The Retrotec 5100 blower door, DM32X gauge, and rCloud reporting platform form a complete system for residential airtightness testing — from measurement to code-compliant documentation.
Blower Door · Fan System
5100
Whole-building airtightness
The Retrotec 5100 series is the workhorse residential blower door. Calibrated fan mounts in a standard doorway with an adjustable aluminum frame and nylon panel. Multiple flow ranges cover everything from tight Passive House envelopes to leaky existing homes.
Max Flow
5,660 CFM
Ranges
Open, A, B, C rings
Frame Fit
29–40 in width
Weight
~35 lbs total
Gauge · Digital Manometer
DM32X
Pressure & flow measurement
The DM32X is far more than a blower door accessory — it’s a standalone diagnostic instrument. Use it for zone pressure diagnostics, duct leakage measurement, pressure mapping, and more. Don’t leave it strapped to the fan.
Channels
A (pressure) + B (flow)
Resolution
0.1 Pa
Auto-Zero
Continuous baseline correction
Connectivity
Bluetooth to rCloud
Software · Cloud Reporting
rCloud
Automated test reports
Skip the homemade report templates. rCloud connects wirelessly to the DM32X, captures test data in real-time, auto-generates code-compliant reports, and stores everything in the cloud. One less thing to worry about on site.
Reports
Auto-generated, code-compliant
Data Sync
Bluetooth from DM32X
Storage
Cloud-based, always accessible
Sharing
PDF export, direct send
§ 04 Setup
Frame assembly done right
Rushing the blower door assembly is how fans end up on the floor — or on you. These are the setup mistakes that cost time, credibility, and occasionally bruises.
Figure 01 · Common Error
Shroud before frame.
Wrapping the nylon shroud before properly sizing and squaring the frame forces a complete disassembly. Always adjust the frame to the doorway first, then attach the shroud.
Figure 02 · Critical Step
Engage the cam levers.
The cam levers lock the frame into the doorway under tension. Without them engaged, fan pressure will push the entire assembly out of the opening. This is the single most dangerous setup error.
Field Wisdom
Take your time with setup. The builder doesn’t know how fast you “should” assemble the blower door. It’s far more embarrassing to have to redo it — or worse, have the fan fly out — than to take an extra five minutes getting it right.
§ 05 Troubleshooting
Reading the gauge
The DM32X tells you everything — if you know how to listen. A “–” on the display isn’t a malfunction. It’s the gauge telling you to change something.
Symptom What you see
Cause What’s happening
Fix What to do
Dash on Ch B
“–” displayed on Channel B at fan speed
Flow is below the minimum for the current range (ring too large)
Try a smaller range — move to the next smaller ring or install a flow ring
Can’t reach 50 Pa
Channel A stuck below target despite max fan speed
Building is very leaky; open range can’t generate enough pressure
Try a larger range — remove rings, use open fan configuration
Negative on Ch B
Channel B shows a negative pressure value instead of flow
Yellow and green tubing swapped — fan connected to wrong port
Switch tubing — match colored tubes to labeled ports on gauge
Unstable readings
Numbers jumping ±10–20% continuously
Wind effect, flapping dampers, or open interior doors creating flutter
Average readings over 10+ seconds; shelter outdoor reference; close interior doors
Zero flow shown
Channel A shows pressure but Channel B reads 0
Tubing disconnected or kinked at gauge or fan
Check all tubing connections — no kinks, secure at both ends
Key Principle
The gauge only calculates flow from positive pressure values on Channel B. If you see a negative number, the tubing is reversed. If you see a dash, you need a different range. Neither is a malfunction — both are operator-correctable in seconds.
§ 06 Leak Hunting
Finding and fixing air leaks
When the building fails, the real work begins. A systematic approach — starting with the biggest, most obvious leaks — saves hours of chasing diminishing returns.
Leak Source Location
How to Find Detection method
How to Fix Remediation
Fireplace
Open damper — often forgotten during pre-test walkthrough
Hand test at firebox; smoke test shows instant draft
Close damper. If no damper exists, seal with foam board + tape for test
Chases
Unsealed mechanical chases connecting basement to attic
Cellulose debris on basement floor near chase; smoke test at top
Spray foam + rigid foam board. Slow or stop the fan during sealing — airflow pushes foam back
Plumbing
Dry P-traps at unused fixtures (washer, basement sinks)
Feel draft at drain; strong airflow at unused fixture drains
Pour water into every trap. A dry trap leaks air — and potentially sewer gas
ERV / HRV
Exhaust ports without backdraft dampers
Strong airflow at exterior vent terminal; smoke test confirms
Tape off during test (valid for continuously-running systems). Recommend damper install
Ceilings
V-joint or T&G ceilings with no air barrier behind, adjacent to vented attic
Room feels noticeably colder during depressurization; IR camera shows temperature gradient
Air barrier must be installed above — not a quick fix during testing
Sill Plate
Sheathing-to-foundation joint unsealed at bottom of wall
Smoke test along base of exterior walls; hand feel at mudsill
Spray foam from interior at rim joist / mudsill junction
Pro Tip
Slow the blower door down or turn it off when sealing large leaks. Airflow through an opening can push spray foam back at you and prevent proper adhesion. Seal the leak, let it cure, then re-pressurize to verify.
§ 07 Diagnostics
The right tool for the leak
Your hands can find obvious leaks. But a proper diagnostic toolkit — smoke, infrared, and the gauge itself — turns a frustrating hunt into a systematic process.
Scenario A
Pinpointing exact leak paths through penetrations and joints
Use AirTracer Smoke
Theatrical smoke or the AirTracer makes air movement visible. Under depressurization, smoke gets pulled toward leaks — showing you exactly where air is crossing the envelope. Essential for chases, penetrations, and joints.
Scenario B
Scanning large areas for hidden leaks behind finishes
Use IR Camera
Infrared thermography reveals temperature differentials caused by air movement behind walls and ceilings. During depressurization, outdoor air infiltrating through hidden pathways shows as cold streaks. Covers large areas fast.
Scenario C
Measuring pressure differences between zones
Use the DM32X Gauge
The DM32X isn’t just a blower door accessory — it’s a standalone pressure diagnostic instrument. Use it to measure pressure across closed doors, between conditioned and unconditioned spaces, and to quantify the “tightness” of individual partitions.
§ 08 Lessons
What experience teaches
Every mistake on this list was made by a real tester on a real job. The difference between a rookie and a veteran isn’t talent — it’s preparation and pattern recognition.
Business & Professionalism
Run it like a business from day one
Energy auditing is a professional service. Treat every job with the rigor your certification demands — even when the client is your cousin.
Pricing
Set fair rates upfront — discounting is easy, raising prices is hard
Reports
Use rCloud — handwritten reports look amateur and waste time
Scope
Define what’s included: test only, or test + diagnostics + remediation guidance?
Follow-up
If the building fails, offer a retest discount after fixes are complete
Technical Execution
Slow is smooth, smooth is fast
Taking five extra minutes on setup saves thirty minutes of troubleshooting. The builder doesn’t have a stopwatch on you — they’re watching for competence, not speed.
Setup
Frame first, shroud second, cam levers always
Tubing
Colors match ports — yellow to Channel A, green to Channel B
Stop the fan when applying spray foam near large openings
§ 09 Resources
Keep learning
Blower door testing has a learning curve, but you don’t have to climb it alone. Retrotec offers training, tech support, and a library of free resources to get you from first test to expert.
Training
Retrotec Online Courses
Self-paced courses covering blower door setup, gauge operation, diagnostics, and code compliance. Available at retrotec.com.
Video
Retrotec YouTube Channel
Product demos, setup walkthroughs, troubleshooting guides, and field tips from the technical training team.
Support
Live Tech Support
Call 888-330-1345 or email support@retrotec.com. The team that built the equipment answers the phone — no scripts, no runaround.
Retrotec
Retrotec is the world’s leading manufacturer of building diagnostic tools, including blower doors, duct testers, and other instruments for measuring airtightness, pressure, and flow. Tens of thousands of Retrotec tools have been trusted by a worldwide customer base. We are committed to providing our customers with the most innovative and accurate tools available, so they can build better, more energy-efficient buildings.