Historic Homes: Handle with Care
If you’ve ever lived in a historic home, you’ve likely noticed the level of comfort can change throughout different parts of the house. This can typically change throughout different times of the year depending on your climate. This is primarily due to excessive air leaks in the home’s enclosure. When we think of improving the home’s comfort, the HVAC system and insulation are the items that usually come to mind. However, the air leaking through the building’s enclosure is equally important, if not more so for these older historic homes.
Let’s start with some history of construction ideologies, processes and materials. The phrase “they don’t build houses like they used to” is absolutely true. Homes that were built during and before the early 1900s were built with a different mindset than modern-day homes. They were constructed primarily to keep occupants out of the elements and were heated with wood burning fireplaces. Many of these homes were built prior to the days of Willis Carrier’s invention of the air conditioner, which meant the occupants had to open the windows if they wanted to cool off during the summer months. This was also before the time of sheet goods which means subfloor systems were plank-style and exterior walls had cross bracing in the walls instead of exterior wall sheathing for racking strength. The exterior sheathing used today helps keep air leakage down since it covers the wall continuously with fewer cracks.
The historic homes still standing today were well constructed -- structurally speaking. This was back when a 2x4 stud was actually 2” by 4” instead of the 1.5” by 3.5” studs we have today. Early homes built near the turn of the century weren’t rushed to meet the tight schedules and deadlines of today’s construction processes, so builders, carpenters and craftsmen had more time to execute their tasks. If you picture a historic home in your mind, it would likely consist of beautiful detailing on the exterior, along with elegant craftsmanship throughout the interior such as custom staircases, woodwork around fireplaces, dentil crown moulding, etc. However, where these homes excel in structural integrity and beauty, they tend to lack in performance when HVAC systems are installed.
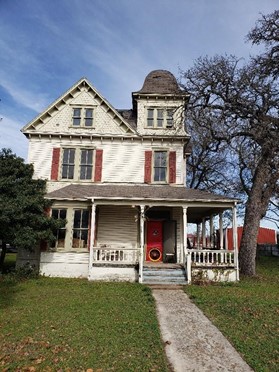
Up until the past few decades, air tightness has not been a concern in residential buildings in the US. It is just now being required by code in some states. Therefore, those who built the historic homes we still have today weren’t thinking about air tightness, and those who might have been didn’t have the knowledge we have today regarding where and how to seal. Retrotec’s own Ben Walker tested the home he grew up in. It is a 1500 sq.ft. home built in 1915 with an air tightness result nearing 5000 CFM50. This is a very high leakage result for a home that size.
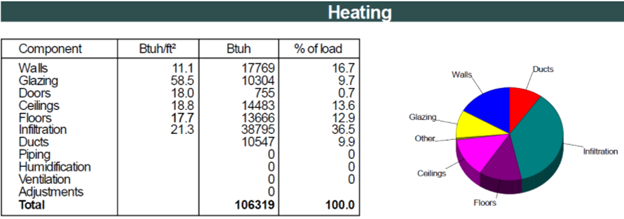
The chart above is the heating load for the house Ben Walker tested. Notice that infiltration makes up over one-third of the load!
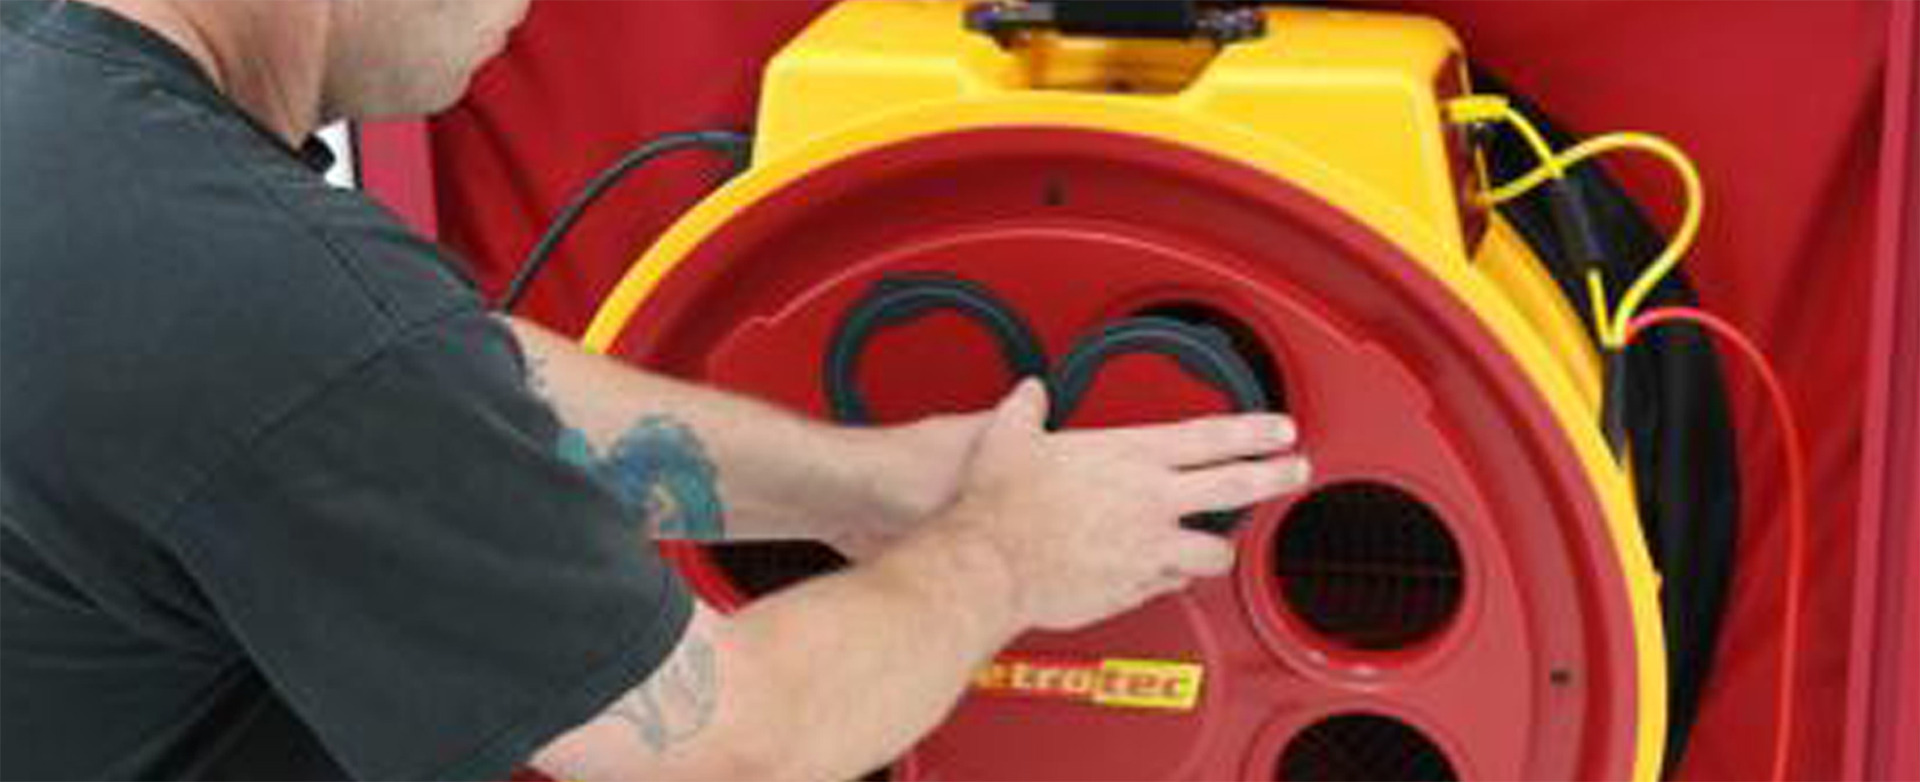
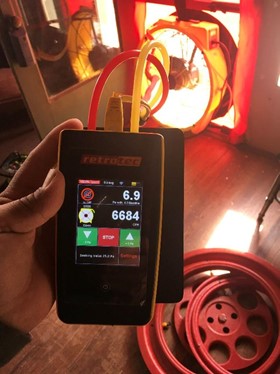
Our friend Jon Esquivel, HVAC trainer and owner of Austin Star Services in Austin, TX, tested a historic home recently and could only get it to pressurize to 7 Pa! The house was so leaky, it was like the envelope was non-existent. At only 7 Pa of pressure, the manometer cannot generate an accurate result of what the leakage would be at 50 Pa, the universal pressure used to test all residential dwellings. The home would either need to be sealed to the extent where the blower door could take a reliable reading, or more fans would need to be added to generate the flow needed to achieve the 50 Pa target pressure.
For both of these homes, the sources of the air leaks were similar: there were holes and cracks all throughout the envelope. Again, this is common for homes from this time period. The lack of a deliberate air barrier results in “death by a thousand paper cuts” when it comes to the blower door test. This goes back to the use of plank-style subfloors and ceilings and shiplap wall coverings that have been replaced with the sheet goods used today such as OSB sheathing and gypsum wall coverings. These modern types of coverings have less cracks which yields less leakage.
However, not all leaks are evenly distributed. In most cases, the majority of the leaks tend to exist along the ceiling. This is true for both historic and modern construction. This is due to mechanical, electrical and plumbing penetrations and the cracks along the top of interior and exterior walls where the wall coverings meet the top plates. More information on the severity of different types of air leaks can be found in a study conducted by Owens Corning in this article in the Journal of Light Construction.
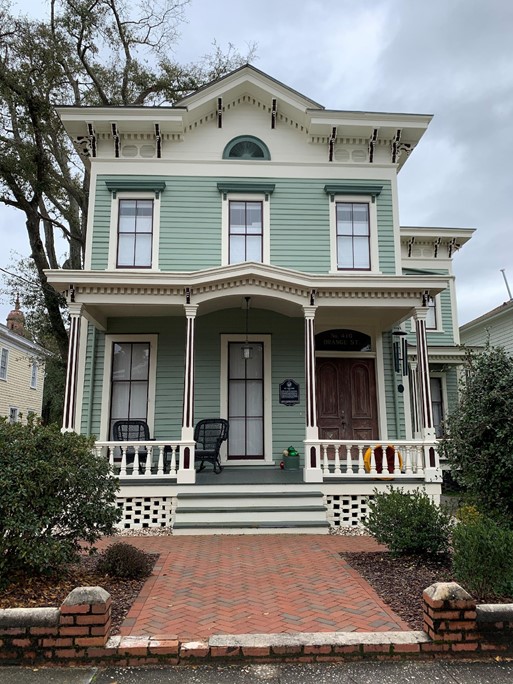
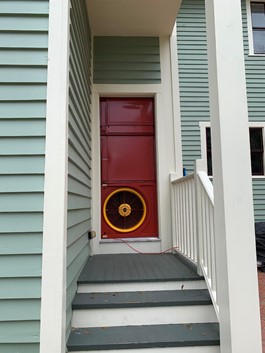
In January of 2021, Retrotec worked with HVAC contractor, Greg Nelson of Green Dot Home Services, in Wilmington, NC to test a historic home. The homeowners were experiencing comfort issues throughout the house and the HVAC system had trouble keeping a constant temperature in the summer and winter months. Utility bills were high as well. Also on this site visit was Nikki Krueger from Santa-Fe/Ultra-Aire Dehumidifiers and Chris Conway from Conway Energy. Wilmington is in a very humid climate, which makes Nikki’s expertise in humid climates, dehumidification and indoor air quality a valuable addition to the project. Chris Conway has a wealth of knowledge when it comes to the performance of historic homes and he provided valuable insight as the team made its way through the house.
An initial walk-through was conducted to get a feel for the home. There were similar construction practices and materials employed as previously mentioned for historic homes. The house was built on a crawl space and it appeared to be in fair condition. The soil and framing members were dry and there were no large sources of air leaks that were noticed. In the attic, all of the wood framing was original including the roof deck. This is impressive since Wilmington is a coastal city that has experienced many hurricanes and tropical storms, and this house has been standing since 1875.
Once the initial walk-through was completed, a blower door test was done to see how leaky the house was, and where some of the leaks were located. As expected, the house was very leaky with a blower door result of 10,000+ CFM50. When we talk about the meaning of the CFM50 result for existing homes, one method that works well is looking at the leakage to area infiltration ratio (LAIR), a term coined by Genry Garcia. This is the ratio between the CFM50 test result and the conditioned floor area of the home. A one-to-one ratio is considered decent for most homes. The Building Performance Institute also uses this ratio to determine when a home needs whole-house ventilation. In this case, the home is 3300 sq. ft., so the LAIR is nearly 3.5 to one which tells us the leakage is extremely high.
Another method of determining the severity of leakage is looking at the air changes per hour at 50 Pa (ACH50), though this is becoming less popular because it doesn’t place houses of different sizes on an even playing field. For example, it is easier for a larger home to meet a lower ACH50 number than it is for a smaller home. For reference, ACCA Manual J considers 8 ACH50 to be “very loose”. The ACH50 of this home was 23, placing it way off the chart. If a contractor were to guess the leakage when doing a load calculation for this house without measuring with the blower door, he/she would be way off the mark.
In the photo below to the right, notice the blower door didn’t make it to -50 Pa, but at -32.2 Pa it was close enough to generate a close estimate of what the leakage would be if it were able to reach -50 Pa by using the extrapolation or “@” feature on the gauge.

After the air tightness was measured, the blower door fan was flipped around to pressurize the home. Once this was done, the team immediately noticed dust becoming airborne in the attic. This was due to a dropped ceiling in a closet that created a large source of leakage. It was covered by a foil backing with insulation on top, so it wasn’t noticeable without the blower door running. There were other large holes in the ceiling around the fireplaces as well.
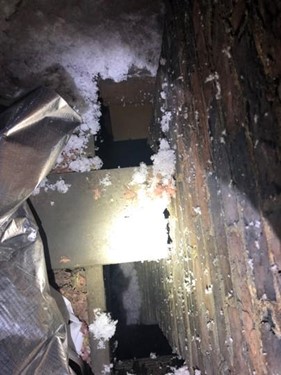
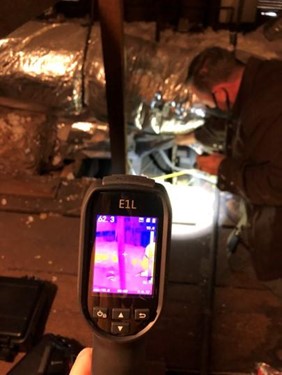
The photo above on the left shows Chris uncovering the hole in the ceiling. This revealed the dropped ceiling below that is covered with foil and insulation. The yellow on the screen of the thermal camera shows heat from the conditioned space underneath being pushed into the attic by the blower door. The photo on the right shows a large gap between one of the chimneys and the attic floor. The space visible below the ceiling is conditioned space inside the home up against the chimney. There are three chimneys like this in the house, so each one will need to be sealed to the attic floor with metal flashing to meet code.
With leakage this excessive, there is no way to control indoor temperature and humidity to create a comfortable living space. The large openings in the attic would need to be addressed in order to remove the large temperature differences and high humidity occurring throughout the house from room to room. In newer homes, a common method used to mitigate leaks in the ceiling is to spray foam the roof deck. This moves the air barrier from the ceiling up to the roof, making any leaks in the ceiling irrelevant now that the attic is part of the conditioned space.
However, it is important to look at historic homes through a different lens. This is where Chris Conway’s expertise came in handy. One thing he focused on was the fact that all of the original wood framing members and the roof deck were still intact and in good shape. Even though the house was performing poorly for the occupants, the structural aspects of the house were in good health and that’s not something we wanted to disrupt.
The roof deck has been wetting and drying repeatedly for well over a century and is still sound. If we were to encapsulate the attic, it could interfere with that pattern of wetting and drying, and possibly cause more problems that it would solve. That cancels out attic encapsulation as a solution, which takes us back to the ceiling plane. The recommendation Chris developed was to seal all of the major leakage areas with a rigid material (rigid foam board, OSB, plywood, etc.) then add a layer of spray foam across the ceiling to seal the rest of the leaks. This gives us a continuous air barrier across the top of the house and allows the roof assembly to continue to ventilate, wet, and dry just as it has since the house was built.
The holes in the ceiling were the largest source of leaks in this house, yet there were also other leakage areas in the exterior walls. To seal these leaks, either the plaster wall coverings would need to come down or the siding on the outside would need to be removed. This would not be a practical solution as there is no need to disrupt that part of the house as it is still structurally sound. These leaks will need to continue to exist but the comfort issues imposed by them can be mitigated with a good ventilation and dehumidification strategy.
As air leaks into buildings, it brings moisture with it, which causes comfort and indoor air quality issues. With Nikki’s guidance, a ventilating dehumidifier was prescribed to reduce the impacts of the leftover leakage in the home. The ventilating dehumidifier brings in outdoor air and applies a slight positive pressure on the building, which helps control some of outdoor air infiltration occurring during warm summer months. This also helps during the shoulder seasons where there isn’t much heating or cooling happening, but humidity is still high.
In addition to a ventilating whole-house dehumidifier, Greg will help the home owners select an appropriately sized heat pump with a new duct system that will better serve the home. Once all of the air sealing is finished, another blower door test will be conducted where that result will be applied to a heating and cooling load calculation. This will allow Greg to determine the size of the system needed to best fit the home.
For those working in the HVAC, insulation and building science fields, developing a solution that doesn’t take away from a historic home’s charm, originality, or integrity can often present a challenging puzzle. Many of these homes have similar issues, but each one has a unique story to tell. It’s easy to get carried away and recommend a solution that would likely work in more modern homes, which is why it is important for us to take our time when thinking about what we might change in a historic home. These structures are like living organisms. Each part of the home is connected to another part, and if we change one thing, it could change something else. For these homes to stand the test of time for so long, something about them is working. The last thing we want to do is stop that home from lasting another century.
This is why it is important to monitor temperature and humidity in the more sensitive parts of the home after changes are made, similar to the way a physician monitors a patient after surgery. This includes attics, crawl spaces and basements; places where we tend to see condensation, mold and rot occur the most. This ensures our changes will allow the occupants to live comfortably without compromising the home’s structural integrity. More importantly, monitoring the home’s conditions provides the guidance needed if we need to tweak any of the changes we made to keep both the home and its occupants happy and healthy.
-A special thanks to Greg Nelson, Nikki Krueger, Chris Conway, Jon Esquivel, and Ben Walker for the work that helped contribute to this article and the work you do each day to make buildings better!
Recent Posts